一、适用环境
1、操作系统:Linux
2、依赖软件:VirtualBox / VMware等虚拟机或云服务器,Anaconda
二、操作步骤
1、下载Anaconda安装包(示例下载版本为2024.10-1)
(1)Linux-x86_64
| Anaconda3常用版本 | 对应python版本 | 安装命令 |
|---|---|---|
| 2025.06-1 | 3.13 | wget https://mirrors.tuna.tsinghua.edu.cn/anaconda/archive/Anaconda3-2025.06-1-Linux-x86_64.sh |
| 2024.10-1 | 3.12 | wget https://mirrors.tuna.tsinghua.edu.cn/anaconda/archive/Anaconda3-2024.10-1-Linux-x86_64.sh |
| 2023.09-0 | 3.11 | wget https://mirrors.tuna.tsinghua.edu.cn/anaconda/archive/Anaconda3-2023.09-0-Linux-x86_64.sh |
| 2022.10 | 3.9 | wget https://mirrors.tuna.tsinghua.edu.cn/anaconda/archive/Anaconda3-2022.10-Linux-x86_64.sh |
| 2021.11 | 3.9 | wget https://mirrors.tuna.tsinghua.edu.cn/anaconda/archive/Anaconda3-2021.11-Linux-x86_64.sh |
| 5.3.1 | 3.7 | wget https://mirrors.tuna.tsinghua.edu.cn/anaconda/archive/Anaconda3-5.3.1-Linux-x86_64.sh |
(2)Linux-aarch64
| Anaconda3常用版本 | 对应python版本 | 安装命令 |
|---|---|---|
| 2025.06-1 | 3.13 | wget https://mirrors.tuna.tsinghua.edu.cn/anaconda/archive/Anaconda3-2025.06-1-Linux-aarch64.sh |
| 2024.10-1 | 3.12 | wget https://mirrors.tuna.tsinghua.edu.cn/anaconda/archive/Anaconda3-2024.10-1-Linux-aarch64.sh |
| 2023.09-0 | 3.11 | wget https://mirrors.tuna.tsinghua.edu.cn/anaconda/archive/Anaconda3-2023.09-0-Linux-aarch64.sh |
| 2022.10 | 3.9 | wget https://mirrors.tuna.tsinghua.edu.cn/anaconda/archive/Anaconda3-2022.10-Linux-aarch64.sh |
| 2021.11 | 3.9 | wget https://mirrors.tuna.tsinghua.edu.cn/anaconda/archive/Anaconda3-2021.11-Linux-aarch64.sh |
(3)若清华源镜像不可用(403,404报错),进入官网查找对应版本链接即可
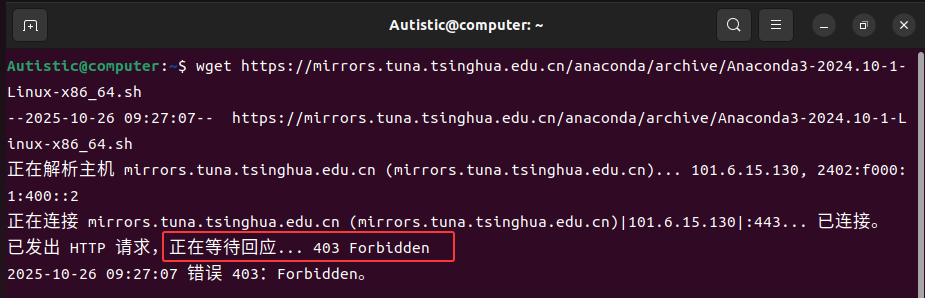
官网链接(可通过Windows主机或其他可视化机器进入官网查看下载链接):
https://repo.anaconda.com/archive
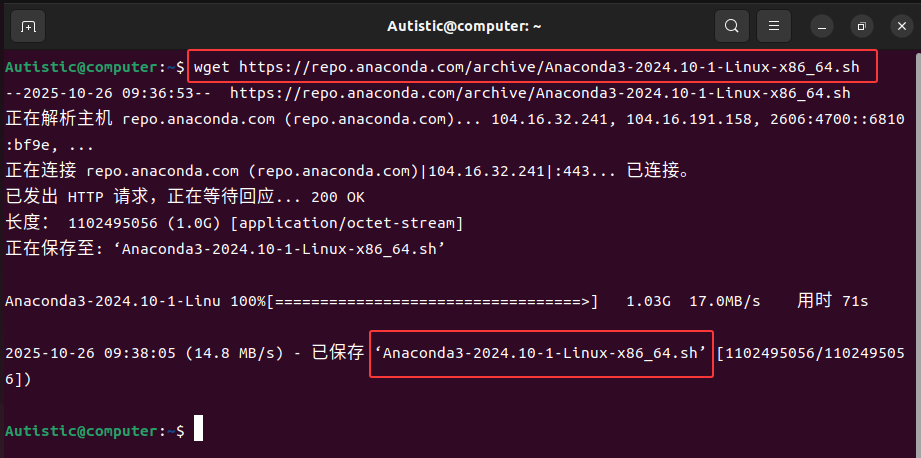
安装命令示例(更换版本安装对应版本,如安装2021.11,将2024.10-1替换为2021.11即可):
wget https://repo.anaconda.com/archive/Anaconda3-2024.10-1-Linux-x86_64.sh
安装包下载完毕:
2、安装
(1)安装命令(根据下载的安装包名称修改)
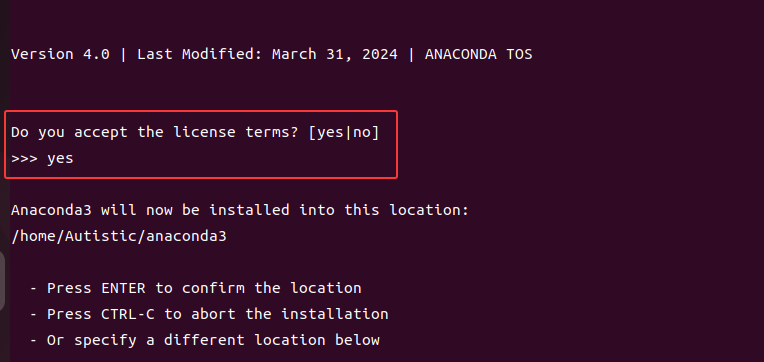
sh Anaconda3-2024.10-1-Linux-x86_64.sh
(2)长按Enter回车直到出现[yes|no],输入yes回车
(3)选择安装位置,如果要修改安装位置,在>>>后面输入要安装的路径
若按默认路径安装,直接Enter回车即可,PREFIX后面会显示安装路径:

(4)这里输入yes初始化自动配置Anaconda的环境变量
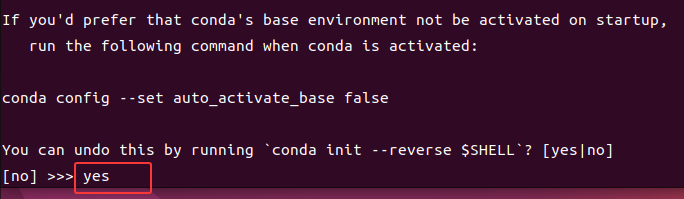
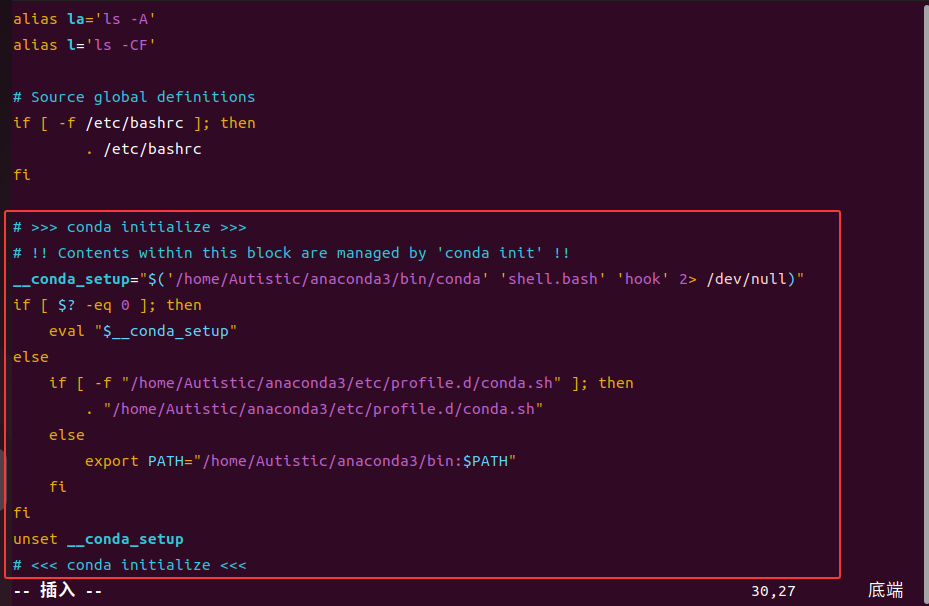
(5)选择yes后初始化过程会自动配置环境变量,可使用vim命令查看(这一步无须操作,可后续自行通过以下命令查看)
vim ~/.bashrc
(6)刷新配置文件,base环境成功显示。
source ~/.bashrc

(7)删除Anaconda安装包(可ls查看安装包名称)
rm -rf Anaconda3-2024.10-1-Linux-x86_64.sh
3、简单测试
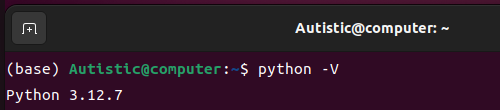
(1)查看Anaconda的python版本
python -V
(2)查看Anaconda的pip版本及路径
pip -V

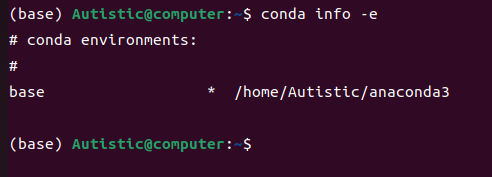
(3)查看环境
conda info -e
4、若有可视化界面,可创建Anaconda桌面快捷方式(可选)
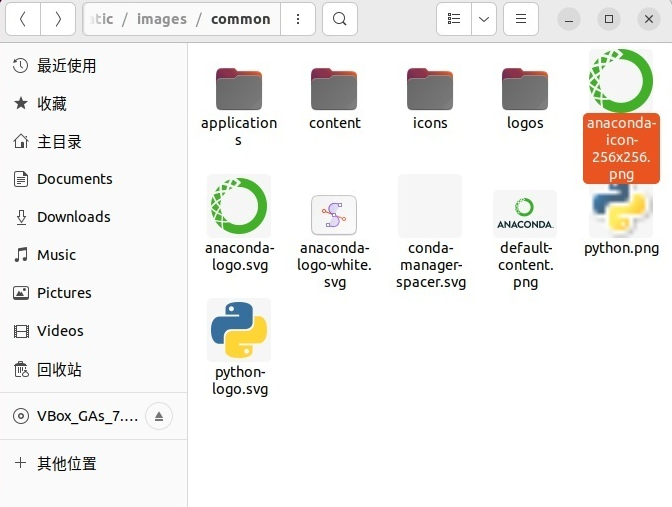
(1)通过文件夹查看图标位置(打开文件夹查看png图标的位置,路径类似,Python版本不同涉及的数字如2.6.3会有细微差别):
/home/Autistic/anaconda3/pkgs/anaconda-navigator-2.6.3-py312h06a4308_0/lib/python3.12/site-packages/anaconda_navigator/static/images/common/anaconda-icon-256x256.png
(2)直接右击桌面打开终端或者cd进入桌面文件夹
cd /home/Autistic/Desktop
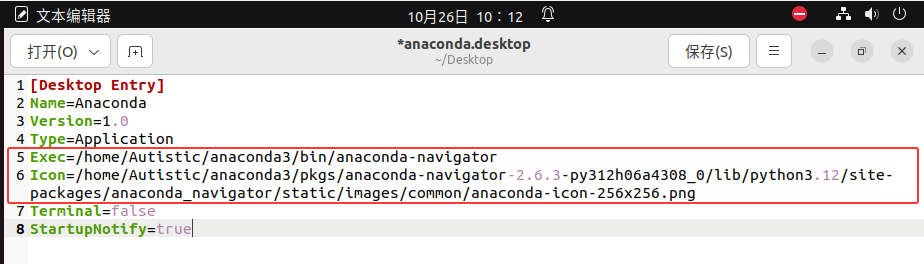
(3)这里使用文本编辑器的方式打开文件
gedit anaconda.desktop
(4)粘贴以下内容到该文件(路径相关的两句命令换为自己的路径)
①Exec可执行路径换为自己的anaconda-navigator路径
②Icon指定快捷方式显示的图标路径,这个位置是查看到的图标路径
[Desktop Entry]
Name=Anaconda
Version=1.0
Type=Application
Exec=/home/Autistic/anaconda3/bin/anaconda-navigator
Icon=/home/Autistic/anaconda3/pkgs/anaconda-navigator-2.6.3-py312h06a4308_0/lib/python3.12/site-packages/anaconda_navigator/static/images/common/anaconda-icon-256x256.png
Terminal=false
StartupNotify=true
③如图所示(打开文件夹查看png图标的位置,路径类似,Python版本不同涉及的数字如2.6.3会有细微差别):
(5)创建完毕后出现桌面图标,会存在叉号,右击选择允许运行。
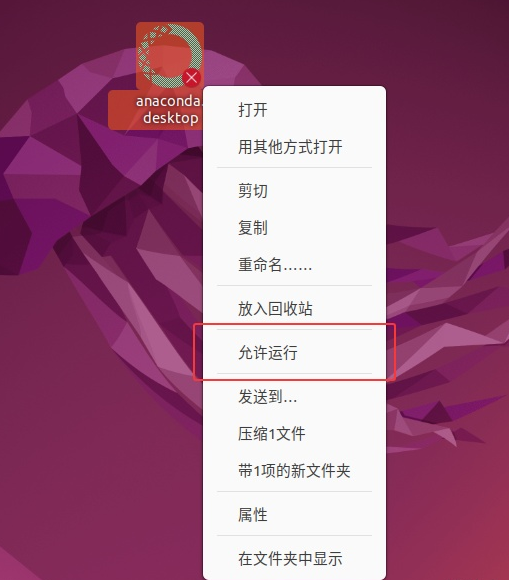
(6)桌面快捷方式创建成功,双击打开测试即可

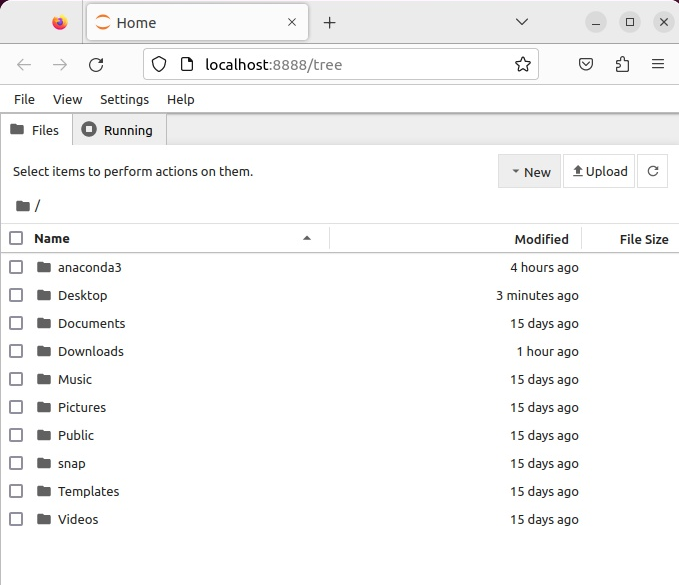
(7)后续通过Anaconda打开Jupyter或Spyder即可

三、补充与扩展
1、若未初始化,则手动添加环境变量(给root用户配置环境变量相同)
(1)打开.bashrc文件编辑
vim ~/.bashrc
(2)在文件末尾粘贴以下命令,将/home/Autistic/anaconda3换为自己的anaconda安装路径(conda info -e可查看安装路径)
export PATH="/home/Autistic/anaconda3/bin:$PATH"
(3)刷新配置
source ~/.bashrc
2、创建Jupyter桌面快捷方式
(1)查找图标路径
/home/Autistic/anaconda3/pkgs/anaconda-navigator-2.6.3-py312h06a4308_0/lib/python3.12/site-packages/anaconda_navigator/static/images/common/applications/d3736075_jupyter.f19bb.png

(2)在桌面Desktop目录下,执行以下命令。
gedit jupyter.desktop
(3)添加以下内容,保存。
[Desktop Entry]
Name=Jupyter Notebook
Version=1.0
Type=Application
Exec=/home/Autistic/anaconda3/bin/jupyter-notebook
Icon=/home/Autistic/anaconda3/pkgs/anaconda-navigator-2.6.3-py312h06a4308_0/lib/python3.12/site-packages/anaconda_navigator/static/images/common/applications/d3736075_jupyter.f19bb.png
Terminal=false
StartupNotify=true

(4)右击允许运行
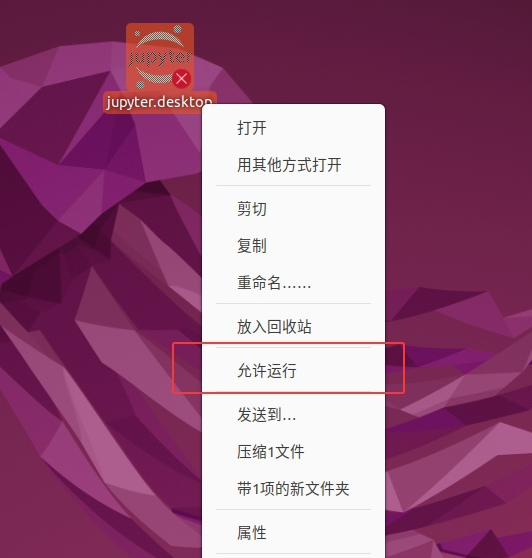
(5)Jupyter Notebook桌面快捷方式创建成功

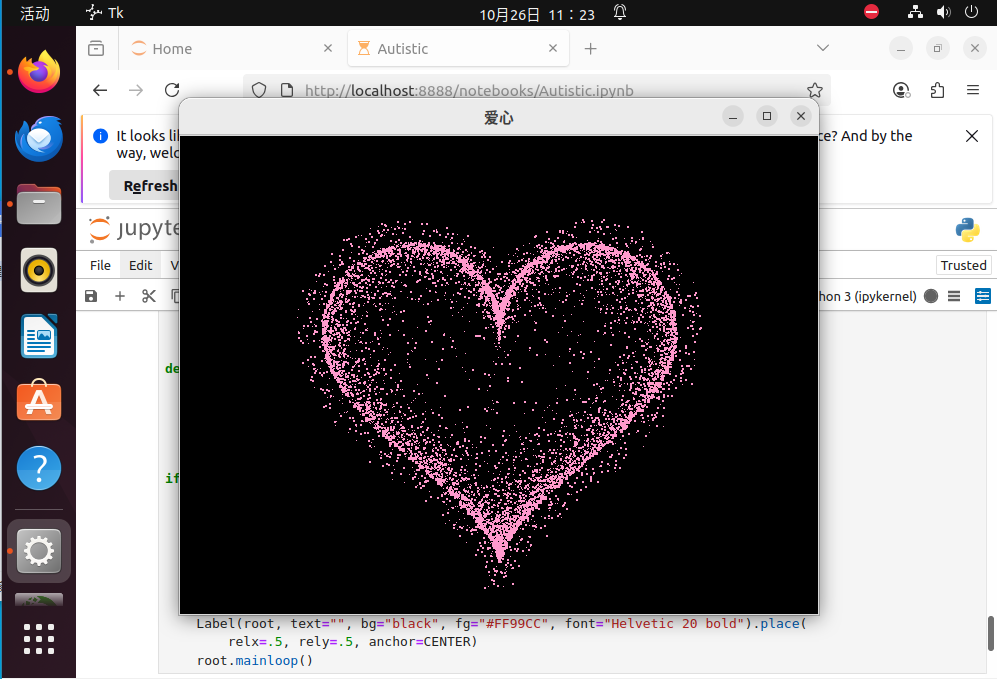
双击打开,可以正常使用:
运行代码测试(爱心代码):
import random
from math import sin, cos, pi, log
from tkinter import *
CANVAS_WIDTH = 640
CANVAS_HEIGHT = 480
CANVAS_CENTER_X = CANVAS_WIDTH / 2
CANVAS_CENTER_Y = CANVAS_HEIGHT / 2
IMAGE_ENLARGE = 11
HEART_COLOR = "#FF99CC"


def center_window(root, width, height):
    screenwidth = root.winfo_screenwidth()  # 获取显示屏宽度
    screenheight = root.winfo_screenheight()  # 获取显示屏高度
    size = '%dx%d+%d+%d' % (width, height, (screenwidth - width) /
                            2, (screenheight - height) / 2)  # 设置窗口居中参数
    root.geometry(size)  # 让窗口居中显示


def heart_function(t, shrink_ratio: float = IMAGE_ENLARGE):
    x = 16 * (sin(t) ** 3)
    y = -(13 * cos(t) - 5 * cos(2 * t) - 2 * cos(3 * t) - cos(4 * t))
    # 放大
    x *= shrink_ratio
    y *= shrink_ratio
    # 移到画布中央
    x += CANVAS_CENTER_X
    y += CANVAS_CENTER_Y
    return int(x), int(y)


def scatter_inside(x, y, beta=0.15):
    ratio_x = - beta * log(random.random())
    ratio_y = - beta * log(random.random())
    dx = ratio_x * (x - CANVAS_CENTER_X)
    dy = ratio_y * (y - CANVAS_CENTER_Y)
    return x - dx, y - dy


def shrink(x, y, ratio):
    force = -1 / (((x - CANVAS_CENTER_X) ** 2 +
                  (y - CANVAS_CENTER_Y) ** 2) ** 0.6)
    dx = ratio * force * (x - CANVAS_CENTER_X)
    dy = ratio * force * (y - CANVAS_CENTER_Y)
    return x - dx, y - dy


def curve(p):
    return 2 * (2 * sin(4 * p)) / (2 * pi)


class Heart:
    def __init__(self, generate_frame=20):
        self._points = set()  # 原始爱心坐标集合
        self._edge_diffusion_points = set()  # 边缘扩散效果点坐标集合
        self._center_diffusion_points = set()  # 中心扩散效果点坐标集合
        self.all_points = {}  # 每帧动态点坐标
        self.build(2000)
        self.random_halo = 1000
        self.generate_frame = generate_frame
        for frame in range(generate_frame):
            self.calc(frame)

    def build(self, number):
        for _ in range(number):
            t = random.uniform(0, 2 * pi)
            x, y = heart_function(t)
            self._points.add((x, y))
        # 爱心内扩散
        for _x, _y in list(self._points):
            for _ in range(3):
                x, y = scatter_inside(_x, _y, 0.05)
                self._edge_diffusion_points.add((x, y))
        # 爱心内再次扩散
        point_list = list(self._points)
        for _ in range(4000):
            x, y = random.choice(point_list)
            x, y = scatter_inside(x, y, 0.17)
            self._center_diffusion_points.add((x, y))

    @staticmethod
    def calc_position(x, y, ratio):
        force = 1 / (((x - CANVAS_CENTER_X) ** 2 +
                      (y - CANVAS_CENTER_Y) ** 2) ** 0.520)
        dx = ratio * force * (x - CANVAS_CENTER_X) + random.randint(-1, 1)
        dy = ratio * force * (y - CANVAS_CENTER_Y) + random.randint(-1, 1)
        return x - dx, y - dy

    def calc(self, generate_frame):
        ratio = 10 * curve(generate_frame / 10 * pi)
        halo_radius = int(4 + 6 * (1 + curve(generate_frame / 10 * pi)))
        halo_number = int(
            3000 + 4000 * abs(curve(generate_frame / 10 * pi) ** 2))
        all_points = []
        # 光环
        heart_halo_point = set()
        for _ in range(halo_number):
            t = random.uniform(0, 2 * pi)
            x, y = heart_function(t, shrink_ratio=11.6)
            x, y = shrink(x, y, halo_radius)
            if (x, y) not in heart_halo_point:
                heart_halo_point.add((x, y))
                x += random.randint(-14, 14)
                y += random.randint(-14, 14)
                size = random.choice((1, 2, 2))
                all_points.append((x, y, size))
        # 轮廓
        for x, y in self._points:
            x, y = self.calc_position(x, y, ratio)
            size = random.randint(1, 3)
            all_points.append((x, y, size))
        # 内容
        for x, y in self._edge_diffusion_points:
            x, y = self.calc_position(x, y, ratio)
            size = random.randint(1, 2)
            all_points.append((x, y, size))
        self.all_points[generate_frame] = all_points
        for x, y in self._center_diffusion_points:
            x, y = self.calc_position(x, y, ratio)
            size = random.randint(1, 2)
            all_points.append((x, y, size))
        self.all_points[generate_frame] = all_points

    def render(self, render_canvas, render_frame):
        for x, y, size in self.all_points[render_frame % self.generate_frame]:
            render_canvas.create_rectangle(
                x, y, x + size, y + size, width=0, fill=HEART_COLOR)


def draw(main: Tk, render_canvas: Canvas, render_heart: Heart, render_frame=0):
    render_canvas.delete('all')
    render_heart.render(render_canvas, render_frame)
    main.after(160, draw, main, render_canvas, render_heart, render_frame + 1)


if __name__ == '__main__':
    root = Tk()
    root.title("爱心")
    center_window(root, CANVAS_WIDTH, CANVAS_HEIGHT)  # 窗口居中显示
    canvas = Canvas(root, bg='black', height=CANVAS_HEIGHT, width=CANVAS_WIDTH)
    canvas.pack()
    heart = Heart()
    draw(root, canvas, heart)
    Label(root, text="", bg="black", fg="#FF99CC", font="Helvetic 20 bold").place(
        relx=.5, rely=.5, anchor=CENTER)
    root.mainloop()
运行结果: