一、关于 audio-separator
音频分离器是一个Python包,允许您将音频文件分成不同的词干,使用由@Anjok07训练的模型与 Ultimate Vocal Remover一起使用。
这个包最简单(也可能是最常用的)用例是将音频文件分成两个词干,乐器和人声,这对于制作卡拉OK视频非常有用!
然而,UVR中可用的模型可以将音频分成更多的词干,如鼓、贝司、钢琴和吉他,并执行其他音频处理任务,如去噪或去除回声/混响。
特点
- 将音频分成多个词干,例如器乐和人声。
- 支持所有常见的音频格式(WAV、MP3、FLAC、M4A等)
- 能够使用PTH或ONNX格式的预训练模型进行推理。
- CLI支持,便于在脚本和批次处理作业中使用。
- 用于集成到其他项目中的Python API。
二、安装🛠️
1、🐳Docker
如果您能够使用docker,您实际上不需要安装任何东西-Docker Hub上发布的映像用于GPU(CUDA)和CPU推理,适用于amd64和arm64平台。
您可能希望卷装一个包含要分离的任何文件的文件夹,然后该文件夹也可以用作输出文件夹。
例如,如果您的当前目录有文件input.wav,您可以执行如下所示audio-separator(有关详细信息,请参阅使用部分):
docker run -it -v `pwd`:/workdir beveradb/audio-separator input.wav
如果您使用带有GPU的机器,您将需要使用特定于GPU的映像并将GPU设备传递到容器,如下所示:
docker run -it --gpus all -v `pwd`:/workdir beveradb/audio-separator:gpu input.wav
如果没有检测到GPU,请确保您的docker运行时环境正确通过GPU-在线有各种指南可以帮助解决这个问题。
2、🎮Nvidia GPU与CUDA或🧪Google Colab
支持的CUDA版本:11.8和12.2
💬如果配置成功,您应该会在运行audio-separator --env_info:ONNXruntime has CUDAExecutionProvider available, enabling acceleration
康达:
conda install pytorch=*=*cuda* onnxruntime=*=*cuda* audio-separator -c pytorch -c conda-forge
pip:
pip install "audio-separator[gpu]"
Docker:
beveradb/audio-separator:gpu
3、Apple Silicon、带有M1或更新CPU的macOS Sonoma+(CoreML加速)
💬如果配置成功,您应该会在运行audio-separator --env_info:ONNXruntime has CoreMLExecutionProvider available, enabling acceleration
pip:
pip install "audio-separator[cpu]"
4、🐢没有硬件加速,只有CPU
康达:
conda install audio-separator-c pytorch -c conda-forge
pip:
pip install "audio-separator[cpu]"
Docker:
beveradb/audio-separator
5、🎥FFmpeg依赖
💬要测试audio-separator是否已成功配置为使用FFmpeg,请运行audio-separator --env_info。日志将显示FFmpeg installed。
如果您安装audio-separator使用conda或docker,FFmpeg应该已经在您的环境中可用。
您可能需要单独安装FFmpeg。它应该很容易在大多数平台上安装,例如:
Debian/Ubuntu🐧:
apt-get update; apt-get install -y ffmpeg
苹果操作系统:
brew update; brew install ffmpeg
三、使用Pip的GPU/CUDA特定安装步骤
理论上,所有你需要做的,让audio-separator与GPU的工作是安装它与[gpu]额外的如上。
但是,有时让PyTorch和ONNX运行时都支持CUDA可能有点棘手,因此可能不会那么容易工作。
您可能需要直接重新安装这两个软件包,让pip为您的平台计算正确的版本,例如:
pip uninstall torch onnxruntimepip cache purgepip install --force-reinstall torch torchvision torchaudiopip install --force-reinstall onnxruntime-gpu
我通常建议使用向导推荐的命令为您的环境安装最新版本的PyTorch:https://pytorch.org/get-started/locally/
可能需要多个CUDA库版本
根据您的CUDA版本和环境,您可能需要为ONNX运行时安装特定版本的CUDA库才能使用您的GPU。
例如,🧪Google Colab现在默认使用CUDA 12,但ONNX运行时仍然需要CUDA 11库才能工作。
如果你看到错误audio-separator或Failed to load library时,你运行cannot open shared object file,这可能是问题。
您可以在CUDA 12旁边安装CUDA 11库,如下所示:
apt update; apt install nvidia-cuda-toolkit
如果您在Google Colab或其他环境中运行时遇到以下消息:
[E:onnxruntime:Default, provider_bridge_ort.cc:1862 TryGetProviderInfo_CUDA] /onnxruntime_src/onnxruntime/core/session/provider_bridge_ort.cc:1539 onnxruntime::Provider& onnxruntime::ProviderLibrary::Get() [ONNXRuntimeError] : 1 : FAIL : Failed to load library libonnxruntime_providers_cuda.so with error: libcudnn_adv.so.9: cannot open shared object file: No such file or directory

[W:onnxruntime:Default, onnxruntime_pybind_state.cc:993 CreateExecutionProviderInstance] Failed to create CUDAExecutionProvider. Require cuDNN 9.* and CUDA 12.*. Please install all dependencies as mentioned in the GPU requirements page (https://onnxruntime.ai/docs/execution-providers/CUDA-ExecutionProvider.html#requirements), make sure they're in the PATH, and that your GPU is supported.
您可以通过运行以下命令来解决此问题:
python -m pip install ort-nightly-gpu --index-url=https://aiinfra.pkgs.visualstudio.com/PublicPackages/_packaging/ort-cuda-12-nightly/pypi/simple/
注意:如果有人知道如何使其更干净,以便我们可以支持两种不同的平台特定依赖项以进行硬件加速,而无需为每个单独的安装过程,请告诉我或提出PR!
四、用法🚀
1、命令行界面(CLI)
您可以通过命令行使用音频分离器,例如:
audio-separator /path/to/your/input/audio.wav --model_filename UVR-MDX-NET-Inst_HQ_3.onnx
此命令将下载指定的模型文件,处理audio.wav输入音频并在当前目录中生成两个新文件,一个包含人声,一个包含乐器。
注意:您不需要自己下载任何文件-音频分隔符会自动为您下载!
要查看支持的模型列表,请运行audio-separator --list_models
列表模型输出中列出的任何文件都可以使用model_filename参数(例如--model_filename UVR_MDXNET_KARA_2.onnx)指定(带有文件扩展名),并且在第一次使用时会自动下载到--model_file_dir(默认值:/tmp/audio-separator-models/)文件夹。
2、列出和过滤可用型号
您可以使用--list_models(或-l)标志查看所有可用模型:
audio-separator --list_models
输出显示包含以下列的表:
- 模型文件名:与之一起使用的文件名
--model_filename - Arch:模型架构(MDX、MDXC、Demucs等)
- 输出茎(SDR):该模型可以分离茎,如果有Signal-to-Distortion分数
- 友好名称:描述模型的人类可读名称
过滤模型
您可以使用--list_filter按词干类型过滤和排序模型列表。例如,要查找可以分隔鼓的模型:
audio-separator -l --list_filter=drums
示例输出:
-----------------------------------------------------------------------------------------------------------------------------------
Model Filename        Arch    Output Stems (SDR)                                            Friendly Name
-----------------------------------------------------------------------------------------------------------------------------------
htdemucs_ft.yaml      Demucs  vocals (10.8), drums (10.1), bass (11.9), other               Demucs v4: htdemucs_ft
hdemucs_mmi.yaml      Demucs  vocals (10.3), drums (9.7), bass (12.0), other                Demucs v4: hdemucs_mmi
htdemucs.yaml         Demucs  vocals (10.0), drums (9.4), bass (11.3), other                Demucs v4: htdemucs
htdemucs_6s.yaml      Demucs  vocals (9.7), drums (8.5), bass (10.0), guitar, piano, other  Demucs v4: htdemucs_6s
限制结果
您可以使用--list_limit限制显示的结果数量。这对于为特定词干找到表现最佳的模型很有用。例如,要查看前5个声音分离模型:
audio-separator -l --list_filter=vocals --list_limit=5
示例输出:
--------------------------------------------------------------------------------------------------------------------------------------------------------------
Model Filename                             Arch  Output Stems (SDR)                   Friendly Name
--------------------------------------------------------------------------------------------------------------------------------------------------------------
model_bs_roformer_ep_317_sdr_12.9755.ckpt  MDXC  vocals* (12.9), instrumental (17.0)  Roformer Model: BS-Roformer-Viperx-1297
model_bs_roformer_ep_368_sdr_12.9628.ckpt  MDXC  vocals* (12.9), instrumental (17.0)  Roformer Model: BS-Roformer-Viperx-1296
vocals_mel_band_roformer.ckpt              MDXC  vocals* (12.6), other                Roformer Model: MelBand Roformer | Vocals by Kimberley Jensen
melband_roformer_big_beta4.ckpt            MDXC  vocals* (12.5), other                Roformer Model: MelBand Roformer Kim | Big Beta 4 FT by unwa
mel_band_roformer_kim_ft_unwa.ckpt         MDXC  vocals* (12.4), other                Roformer Model: MelBand Roformer Kim | FT by unwa
JSON输出
对于编程用途,您可以以JSON格式输出模型列表:
audio-separator -l --list_format=json
3、完整的命令行界面选项
usage: audio-separator [-h] [-v] [-d] [-e] [-l] [--log_level LOG_LEVEL] [--list_filter LIST_FILTER] [--list_limit LIST_LIMIT] [--list_format {

      pretty,json}] [-m MODEL_FILENAME] [--output_format OUTPUT_FORMAT]
                       [--output_bitrate OUTPUT_BITRATE] [--output_dir OUTPUT_DIR] [--model_file_dir MODEL_FILE_DIR] [--download_model_only] [--invert_spect] [--normalization NORMALIZATION]
                       [--amplification AMPLIFICATION] [--single_stem SINGLE_STEM] [--sample_rate SAMPLE_RATE] [--use_soundfile] [--use_autocast] [--custom_output_names CUSTOM_OUTPUT_NAMES]
                       [--mdx_segment_size MDX_SEGMENT_SIZE] [--mdx_overlap MDX_OVERLAP] [--mdx_batch_size MDX_BATCH_SIZE] [--mdx_hop_length MDX_HOP_LENGTH] [--mdx_enable_denoise] [--vr_batch_size VR_BATCH_SIZE]
                       [--vr_window_size VR_WINDOW_SIZE] [--vr_aggression VR_AGGRESSION] [--vr_enable_tta] [--vr_high_end_process] [--vr_enable_post_process]
                       [--vr_post_process_threshold VR_POST_PROCESS_THRESHOLD] [--demucs_segment_size DEMUCS_SEGMENT_SIZE] [--demucs_shifts DEMUCS_SHIFTS] [--demucs_overlap DEMUCS_OVERLAP]
                       [--demucs_segments_enabled DEMUCS_SEGMENTS_ENABLED] [--mdxc_segment_size MDXC_SEGMENT_SIZE] [--mdxc_override_model_segment_size] [--mdxc_overlap MDXC_OVERLAP]
                       [--mdxc_batch_size MDXC_BATCH_SIZE] [--mdxc_pitch_shift MDXC_PITCH_SHIFT]
                       [audio_files ...]

Separate audio file into different stems.

positional arguments:
  audio_files                                            The audio file paths to separate, in any common format.

options:
  -h, --help                                             show this help message and exit

Info and Debugging:
  -v, --version                                          Show the program's version number and exit.
  -d, --debug                                            Enable debug logging, equivalent to --log_level=debug.
  -e, --env_info                                         Print environment information and exit.
  -l, --list_models                                      List all supported models and exit. Use --list_filter to filter/sort the list and --list_limit to show only top N results.
  --log_level LOG_LEVEL                                  Log level, e.g. info, debug, warning (default: info).
  --list_filter LIST_FILTER                              Filter and sort the model list by 'name', 'filename', or any stem e.g. vocals, instrumental, drums
  --list_limit LIST_LIMIT                                Limit the number of models shown
  --list_format {pretty,json}                            Format for listing models: 'pretty' for formatted output, 'json' for raw JSON dump

Separation I/O Params:
  -m MODEL_FILENAME, --model_filename MODEL_FILENAME     Model to use for separation (default: model_bs_roformer_ep_317_sdr_12.9755.yaml). Example: -m 2_HP-UVR.pth
  --output_format OUTPUT_FORMAT                          Output format for separated files, any common format (default: FLAC). Example: --output_format=MP3
  --output_bitrate OUTPUT_BITRATE                        Output bitrate for separated files, any ffmpeg-compatible bitrate (default: None). Example: --output_bitrate=320k
  --output_dir OUTPUT_DIR                                Directory to write output files (default: <current dir>). Example: --output_dir=/app/separated
  --model_file_dir MODEL_FILE_DIR                        Model files directory (default: /tmp/audio-separator-models/). Example: --model_file_dir=/app/models
  --download_model_only                                  Download a single model file only, without performing separation.

Common Separation Parameters:
  --invert_spect                                         Invert secondary stem using spectrogram (default: False). Example: --invert_spect
  --normalization NORMALIZATION                          Max peak amplitude to normalize input and output audio to (default: 0.9). Example: --normalization=0.7
  --amplification AMPLIFICATION                          Min peak amplitude to amplify input and output audio to (default: 0.0). Example: --amplification=0.4
  --single_stem SINGLE_STEM                              Output only single stem, e.g. Instrumental, Vocals, Drums, Bass, Guitar, Piano, Other. Example: --single_stem=Instrumental
  --sample_rate SAMPLE_RATE                              Modify the sample rate of the output audio (default: 44100). Example: --sample_rate=44100
  --use_soundfile                                        Use soundfile to write audio output (default: False). Example: --use_soundfile
  --use_autocast                                         Use PyTorch autocast for faster inference (default: False). Do not use for CPU inference. Example: --use_autocast
  --custom_output_names CUSTOM_OUTPUT_NAMES              Custom names for all output files in JSON format (default: None). Example: --custom_output_names='{

      "Vocals": "vocals_output", "Drums": "drums_output"}'

MDX Architecture Parameters:
  --mdx_segment_size MDX_SEGMENT_SIZE                    Larger consumes more resources, but may give better results (default: 256). Example: --mdx_segment_size=256
  --mdx_overlap MDX_OVERLAP                              Amount of overlap between prediction windows, 0.001-0.999. Higher is better but slower (default: 0.25). Example: --mdx_overlap=0.25
  --mdx_batch_size MDX_BATCH_SIZE                        Larger consumes more RAM but may process slightly faster (default: 1). Example: --mdx_batch_size=4
  --mdx_hop_length MDX_HOP_LENGTH                        Usually called stride in neural networks, only change if you know what you're doing (default: 1024). Example: --mdx_hop_length=1024
  --mdx_enable_denoise                                   Enable denoising during separation (default: False). Example: --mdx_enable_denoise

VR Architecture Parameters:
  --vr_batch_size VR_BATCH_SIZE                          Number of batches to process at a time. Higher = more RAM, slightly faster processing (default: 1). Example: --vr_batch_size=16
  --vr_window_size VR_WINDOW_SIZE                        Balance quality and speed. 1024 = fast but lower, 320 = slower but better quality. (default: 512). Example: --vr_window_size=320
  --vr_aggression VR_AGGRESSION                          Intensity of primary stem extraction, -100 - 100. Typically, 5 for vocals & instrumentals (default: 5). Example: --vr_aggression=2
  --vr_enable_tta                                        Enable Test-Time-Augmentation; slow but improves quality (default: False). Example: --vr_enable_tta
  --vr_high_end_process                                  Mirror the missing frequency range of the output (default: False). Example: --vr_high_end_process
  --vr_enable_post_process                               Identify leftover artifacts within vocal output; may improve separation for some songs (default: False). Example: --vr_enable_post_process
  --vr_post_process_threshold VR_POST_PROCESS_THRESHOLD  Threshold for post_process feature: 0.1-0.3 (default: 0.2). Example: --vr_post_process_threshold=0.1

Demucs Architecture Parameters:
  --demucs_segment_size DEMUCS_SEGMENT_SIZE              Size of segments into which the audio is split, 1-100. Higher = slower but better quality (default: Default). Example: --demucs_segment_size=256
  --demucs_shifts DEMUCS_SHIFTS                          Number of predictions with random shifts, higher = slower but better quality (default: 2). Example: --demucs_shifts=4
  --demucs_overlap DEMUCS_OVERLAP                        Overlap between prediction windows, 0.001-0.999. Higher = slower but better quality (default: 0.25). Example: --demucs_overlap=0.25
  --demucs_segments_enabled DEMUCS_SEGMENTS_ENABLED      Enable segment-wise processing (default: True). Example: --demucs_segments_enabled=False

MDXC Architecture Parameters:
  --mdxc_segment_size MDXC_SEGMENT_SIZE                  Larger consumes more resources, but may give better results (default: 256). Example: --mdxc_segment_size=256
  --mdxc_override_model_segment_size                     Override model default segment size instead of using the model default value. Example: --mdxc_override_model_segment_size
  --mdxc_overlap MDXC_OVERLAP                            Amount of overlap between prediction windows, 2-50. Higher is better but slower (default: 8). Example: --mdxc_overlap=8
  --mdxc_batch_size MDXC_BATCH_SIZE                      Larger consumes more RAM but may process slightly faster (default: 1). Example: --mdxc_batch_size=4
  --mdxc_pitch_shift MDXC_PITCH_SHIFT                    Shift audio pitch by a number of semitones while processing. May improve output for deep/high vocals. (default: 0). Example: --mdxc_pitch_shift=2
4、作为Python项目中的依赖项
您可以在自己的Python项目中使用音频分离器。这是一个使用默认两个词干(乐器和人声)模型的最小示例:
from audio_separator.separator import Separator

# Initialize the Separator class (with optional configuration properties, below)
separator = Separator()

# Load a machine learning model (if unspecified, defaults to 'model_mel_band_roformer_ep_3005_sdr_11.4360.ckpt')
separator.load_model()

# Perform the separation on specific audio files without reloading the model
output_files = separator.separate('audio1.wav')

print(f"Separation complete! Output file(s): {

        ' '.join(output_files)}")
批量加工和多型号加工
您可以处理多个文件而无需重新加载模型以节省时间和内存。
您只需要在选择或更改模型时加载模型。见下面的示例:
from audio_separator.separator import Separator

# Initialize the Separator with other configuration properties, below
separator = Separator()

# Load a model
separator.load_model(model_filename='UVR-MDX-NET-Inst_HQ_3.onnx')

# Separate multiple audio files without reloading the model
output_file_paths_1 = separator.separate('audio1.wav')
output_file_paths_2 = separator.separate('audio2.wav')
output_file_paths_3 = separator.separate('audio3.wav')

# Load a different model
separator.load_model(model_filename='UVR_MDXNET_KARA_2.onnx')

# Separate the same files with the new model
output_file_paths_4 = separator.separate('audio1.wav')
output_file_paths_5 = separator.separate('audio2.wav')
output_file_paths_6 = separator.separate('audio3.wav')
Renaming Stems
You can rename the output files by specifying the desired names. For example:
output_names = {


    "Vocals": "vocals_output",
    "Instrumental": "instrumental_output",
}
output_files = separator.separate('audio1.wav', output_names)
在这种情况下,输出文件名将是:vocals_output.wav和instrumental_output.wav。
您还可以重命名特定的词干:
output_names = {
    "Vocals": "vocals_output",
}
output_files = separator.separate('audio1.wav', output_names)
输出文件将命名为:
vocals_output.wav和audio1_(Instrumental)_model_mel_band_roformer_ep_3005_sdr_11.wav
output_names = {


    "Instrumental": "instrumental_output",
}
output_files = separator.separate('audio1.wav', output_names)
输出文件将命名为:
audio1_(Vocals)_model_mel_band_roformer_ep_3005_sdr_11.wav和instrumental_output.wav
- htdemucs_6s. yaml
output_names = {


    "Vocals": "vocals_output",
    "Drums": "drums_output",
    "Bass": "bass_output",
    "Other": "other_output",
    "Guitar": "guitar_output",
    "Piano": "piano_output",
}
output_names = {


    "Vocals": "vocals_output",
    "Drums": "drums_output",
    "Bass": "bass_output",
    "Other": "other_output",
}
五、分隔符类的参数
log_level:(可选)日志记录级别,例如,INFO、DEBUG、警告。Default: logging.INFOlog_formatter:(可选)日志格式。默认值:无,回退到“%(asctime)s-%(level name)s-%(mode)s-%(message)s”model_file_dir:(可选)缓存模型文件的目录。Default: /tmp/audio-separator-models/output_dir:(可选)将保存分隔文件的目录。如果未指定,请使用当前目录。output_format:(可选)编码输出文件的格式,任何常见格式(WAV、MP3、FLAC、M4A等)。Default: WAVnormalization_threshold:Default: 0.9amplification_threshold:Default: 0.0output_single_stem:(可选)仅输出单个词干,例如“乐器”和“人声”。Default: Noneinvert_using_spec:(可选)使用频谱图反转的标志。Default: Falsesample_rate:(可选)设置输出音频的采样率。Default: 44100use_soundfile:(可选)使用声音文件进行输出写入,可以解决OOM问题,尤其是在较长的音频上。use_autocast:Default: Falsemdx_paramsmdx_paramsDefault: {"hop_length": 1024, "segment_size": 256, "overlap": 0.25, "batch_size": 1, "enable_denoise": False}vr_paramsvr_paramsDefault: {"batch_size": 1, "window_size": 512, "aggression": 5, "enable_tta": False, "enable_post_process": False, "post_process_threshold": 0.2, "high_end_process": False}demucs_paramsdemucs_paramsDefault: {"segment_size": "Default", "shifts": 2, "overlap": 0.25, "segments_enabled": True}mdxc_paramsmdxc_paramsDefault: {"segment_size": 256, "override_model_segment_size": False, "batch_size": 1, "overlap": 8, "pitch_shift": 0}
六、要求📋
Python>=3.10
库:torch、onnx、onnxruntime、numpy、librosa、请求、六、tqdm、pydub
七、本地化开发
本项目使用 Poetry 进行依赖管理和打包。按照以下步骤设置本地开发环境:
1、先决条件
- 确保您的机器上安装了Python 3.10或更新版本。
- 安装Conda(我推荐Miniforge:Miniforge GitHub)来管理您的Python虚拟环境
2、克隆存储库
将存储库克隆到本地机器:
git clone https://github.com/YOUR_USERNAME/audio-separator.git
cd audio-separator
如果您已经分叉了存储库,请将YOUR_USERNAME替换为您的GitHub用户名,如果您有权限,请使用主存储库URL。
3、创建并激活Conda环境
要创建和激活conda环境,请使用以下命令:
conda env create
conda activate audio-separator-dev
4、安装依赖项
进入conda环境后,运行以下命令来安装项目依赖项:
poetry install
安装额外的依赖项,具体取决于您使用的是GPU还是CPU。
poetry install --extras "cpu"
或者
poetry install --extras "gpu"
5、在本地运行命令行界面
您可以直接在虚拟环境中运行CLI命令。例如:
audio-separator path/to/your/audio-file.wav
6、停用虚拟环境
完成开发工作后,您只需键入以下内容即可退出虚拟环境:
conda deactivate
7、构建包
要构建用于分发的包,请使用以下命令:
poetry build
这将在dist目录中生成分发包-但目前只有@beveradb能够发布到PyPI。
八、如何在Colab中使用
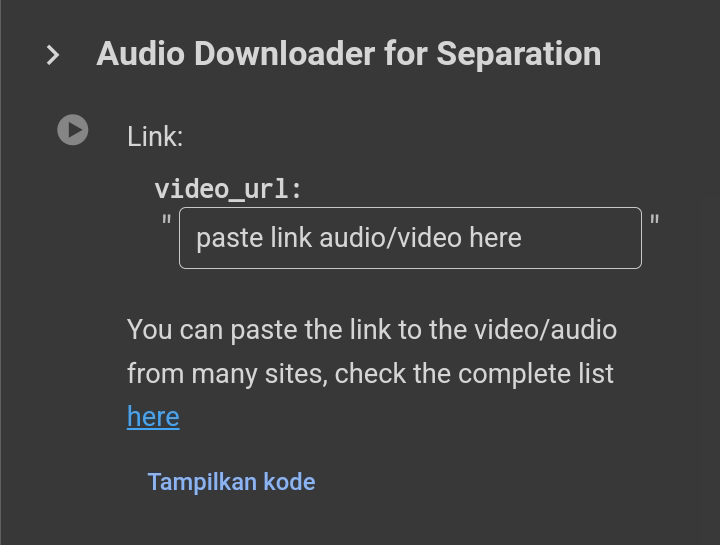
1、链接输入:
-
video_url:此输入是您粘贴要下载的音频或视频的URL的地方。它可以来自yt-dlp支持的各种平台。有关支持的网站的完整列表,请参阅此链接。
-
示例:
https://www.youtube.com/watch?v=exampleID
2、输入音频文件进行分离:
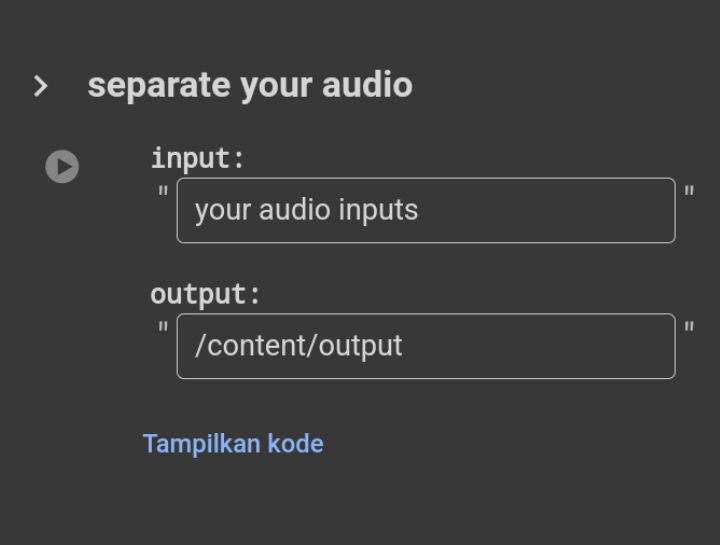
- 输入:这是您要分离的音频的文件路径。下载音频文件后,您需要指定此路径才能继续分离。
- 示例:
/content/ytdl/your_downloaded_audio.wav
3、输出目录
- 输出:这是保存分离文件的路径。它默认为
/content/output,但如果需要,可以更改为另一个目录。 - 示例:
/content/custom_output
2025-01-07(二)